How to code with external sensors

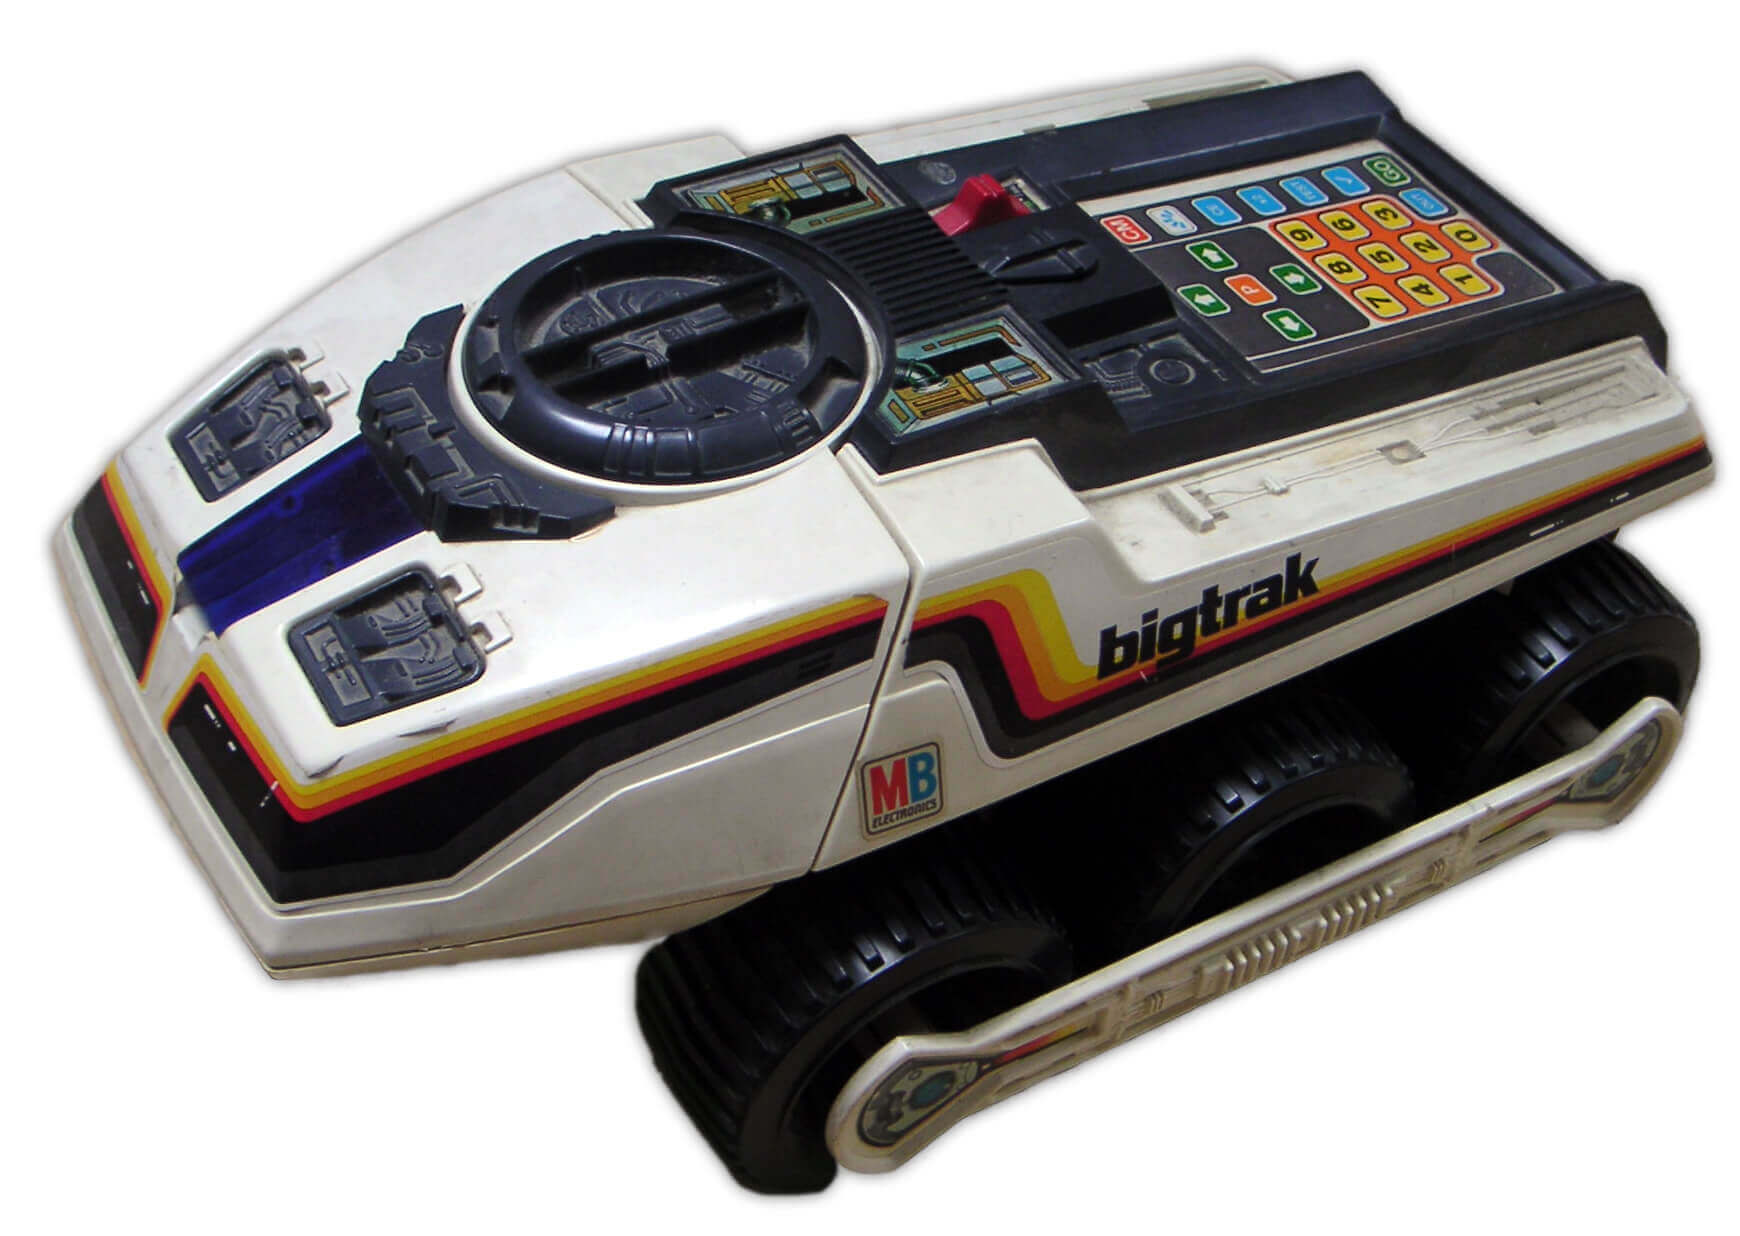
If you went to school around the same time as me, you may have been lucky enough to play, I mean learn, with the amazing bigtrak robot. I can clearly remember this trundling across the carpet as we used its control panel to issue instructions. Happy days.
It’s fantastic that students nowadays are doing so much coding. Free programs like Scratch make it so easy for children to learn core concepts, such as selection, repetition and the use of variables, but if we don’t also provide opportunities for students to work with external hardware, they’re missing out.
Whilst BeeBots, ProBots, Roamers and, indeed the bigtrak present lots of opportunities for students to code, I’m most excited by the increasing opportunities that devices like the Crumble Controller provide. If you haven’t yet read my blog about why I feel this is a great device, take a look.
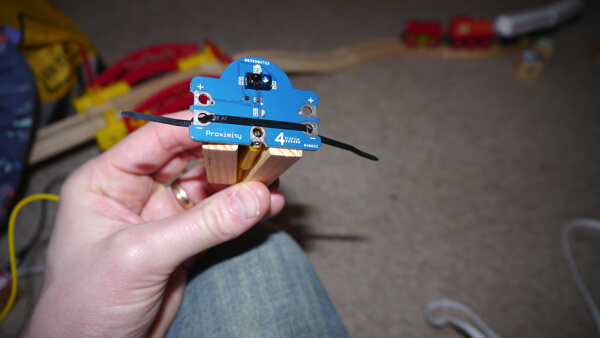
Having experimented with basic sensors (switches and sliders), I was keen to try out some other crumbs (sensors) to see what could be achieved. After receiving a motion sensor, proximity sensor and light sensor from 4tronix, my son and I got to work.
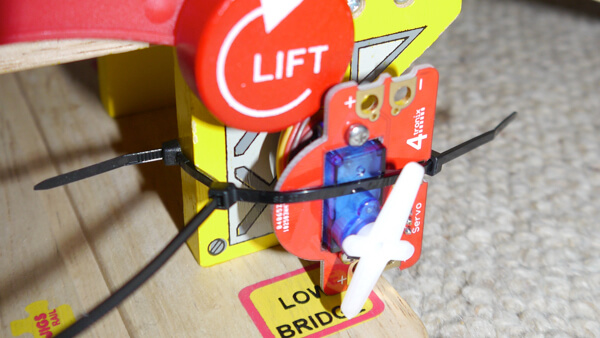
Train set
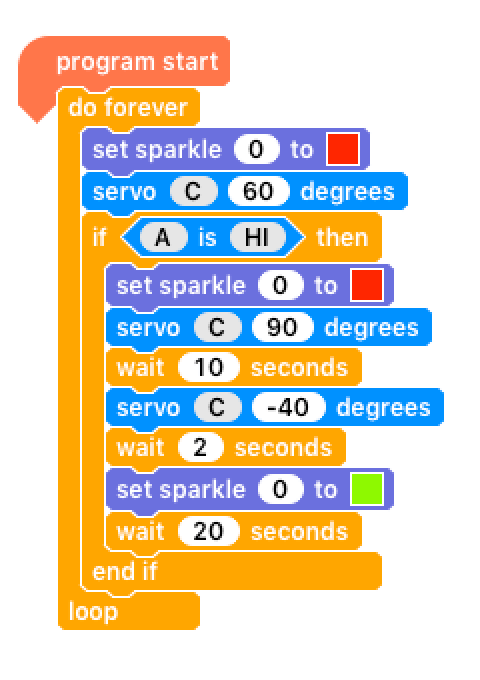
The aim was to position the proximity sensor alongside the track so that when the train passed, a series of events were triggered. The first was to change a sparkle (colour chaining LED) to red and then to use the servo to open the barrier on the bridge.
We threw in a few wait commands to try and get the timing right. Here’s the code:
And this is what we ended up with:
The coding was pretty straight forward and is well within the reach of any students who have done even some basic drag and drop programming, such as with Scratch. The biggest challenge by far was securing the sensors and servo to the wooden toy, although this is not surprising. This is where robotic products from companies like K-Nex and Lego excel; they’re so easy to interconnect, but I guess this ‘ease of use’ does result in fewer applications.
In the end I found zip-ties to be the solution. They’re easy to use, nicely fit through the holes on the crumbs and pretty much allowed me to attach them to anything. It’s a shame they’re not really reusable, but they are cheap.
Light operated robot
Our second project on this wet and windy Saturday morning was to use the light sensor to create a car that drove forward when a torch was shone at it. We’d stumbled across an old Lego motor which just so happened to operate at 5 volts - perfect for use with the Crumble. In fact, one of the many advantages of the Crumble is that it can be used with such a broad range of components.
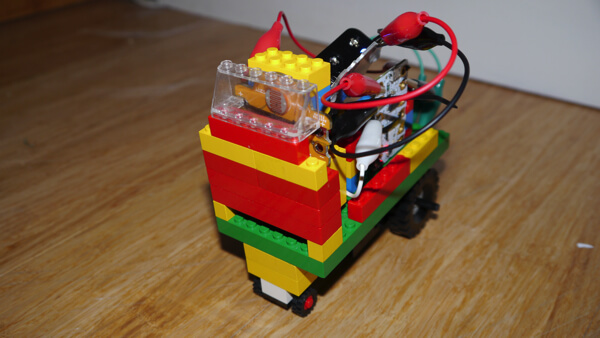
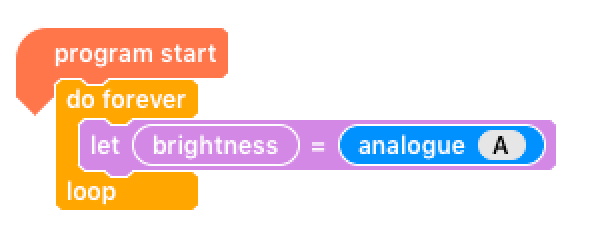
After attaching everything (again making good use of zip ties), we were ready to code. This time though, we needed to do a little more work. I knew the light sensor would provide values between 0 and 255, but I had no idea what sort of range we could reasonably expect with our light source. The first step therefore was to establish this and then adapt it to suit our needs.
This simple program allowed us to see the range of values possible, which, helped by my powerful mountain biking torch, was actually heading well towards 200.
This presented a problem though; we wanted to use the value from the light sensor (heading towards 200) as the input variable for the power of the motor, which works with percentages. It was therefore necessary to adapt the input value so it fell within a usable range (0 to 100). In this situation, halving it worked really well.
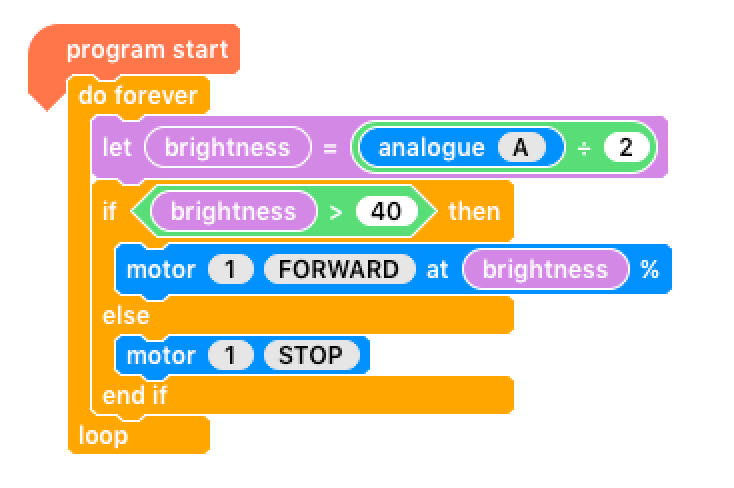
It was then a simple case of using an IF ELSE statement to set the motor to drive forward when a certain level of light was received, at a faster speed if the light was brighter. It worked a treat, even with my light in flashing ‘commuter’ mode!
Hints for the classroom
Here are some hints to help you get up and running with control technology within the classroom:
- Start by understanding the sensors before you build anything. Use very simple loops to establish the range of values a sensor operates within.
- Keep the DT element as simple as possible. Securing everything can be frustrating, so have a good supply of zip ties as these work really well
- To begin with, make something large with plenty of space for components. Crumble projects can quickly become a little ‘busy’, especially if multiple crumbs (sensors) are used along with longer-than-necessary crocodile leads. A larger project will make it easier to debug any connection issues.
Bigtrak image based on a GPL work by User:MartinLing on 2006-04-30

Comments
Anne Croft - Posted February 18, 2016
It would be great if you posted some step by step guides for some of your crumble projects. I can't really see from the videos, how you made them
Thanks
Chris - Posted February 19, 2016
Hi Anne,
I'm obsessed with the crumble so will certainly be posting more on it. In fact, I'll soon be adding some crumble lessons to our coding curriculum which will provide more detailed step-by-step guides for children and teachers.
Chris